Blender as a gis visualization tool
Using BlenderGIS Add-on Feature
In a post I made awhile back, I talked about how aesthetics is important in conveying technical information in a visually appealing manner. If you’re curious you can read it here and this post is a follow-up to that.
Today, I’ll be discussing the methods and steps used so that you too can make stunning lighting effects in your projects.
Software Requirements
To be able to follow along, you’d need:
Blender downloaded and installed onto your machine. It is open source so you can download from their website. I’ve already got blender 3.2.1 on my machine.
Device Specifications
For rending, using a machine with higher processing power is recommended. My machine runs on intel core i5 processor with 8 Gb of RAM and it works fine for my projects.
Assumed Knowledge
You should also have familiarity handling and manipulating spatial datasets especially raster data, along with projection systems. However, if you have experience in other mapping software, you should be able to catch on as you follow along (don’t worry, I got you).
Let’s begin…
In a nutshell, we will be taking a satellite basemap imagery of Port Moresby (capital city of Papua New Guinea) using the BlenderGIS add-on and then superimpose this onto elevation data extracted from OpenTopography using the API key to create relief. We will then extrude building footprints and load in street networks from open street maps. All this will be done in Blender.
1. Create User Credentials in OpenTopography
We will first need to have user credentials in OpenTopography. This will allow you to use its API which the BlenderGIS Add-on will require when extracting elevation and basemaps. Head over to OpenTopography and create your login. Once you have done that, log in and click on “MyOpenTopo”, this will take you to your workbench where you can request for an API Key.
Once you have received your API key, save it in a text file where you can access it later.
2. Download BlenderGIS
Blender doesn’t come with BlenderGIS installed and enabled (at least for my version) so we will have to do this manually. The installation files are hosted on the github repository which is an online platform for developers to host and test their code (don’t worry we aren’t doing any coding today). Head over to the github repository and click the green button labeled “<> code”, then select Download ZIP to start the download process. This should take less than a minute.
3. Install and Enable BlenderGIS
Now, fire up Blender. Once you get into blender you should be presented with the Layout window. I know its intimidating if this is the first time your eyes have landed on this interface because I was too! There’s heaps of resources online that you can access to help you familiarize yourself so for this step, I’ll only direct you to sections relevant for this project. Select the cube object in the scene by left-clicking it and then then press X on your keyboard to delete.
Next (and you only do this once) is to install the BlenderGIS Add-on. Go to Edit > Preferences > Add-ons > Install, and then browse to where you downloaded the BlenderGIS zip folder and click “Install Add-on”.
Once it is installed, in the Blender Preferences window you should be able to see 3D View: BlenderGIS. If not, make sure to change the filter view to “All” and then check the box to enable BlenderGIS.
4. Get Basemap and Elevation Data
Go to the layout window, you should now be able to see the BlenderGIS Add-on displayed as “GIS”. Click on GIS > Web geodata > Basemap.
This will open up the Basemap dialogue box. Choose your Basemap source, layer and leave everything as default and click Ok. Now, using your mouse wheel scroll and pan with the left mouse button to your region of interest (ROI) and press E on your keyboard to crop it.
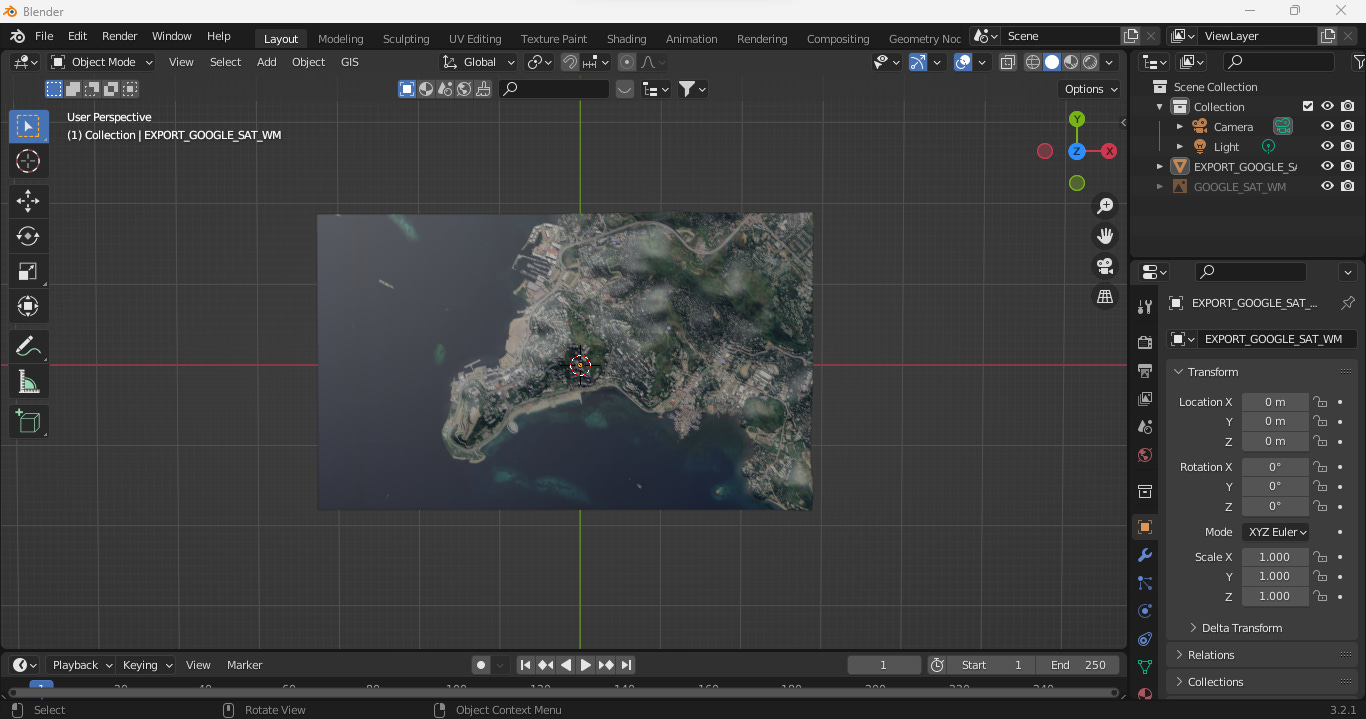
At this stage, the cropped basemap is an image texture plane. You can rotate about the 3D view axis by pressing and holding the mouse wheel. Nothing interesting as yet but if you’ve made it this far, give yourself a pat! You have been meticulous thus far!
Now lets add the elevation data to bring this basemap to life. Go to GIS > Web geodata > Get elevation (SRTM). Select your resolution type and enter the API key you retrieved from OpenTopography and click ok. Watch as your basemap superimpose onto the elevation layer.
Next, lets load in the buildings footprints. Go to GIS > Web geodata > get OSM. In the dialogue window that pops up, select buildings > check the box Elevation from object > check the box Buildings extrusion and click ok. This will load in the open street map buildings. Do the same to load streets.
Fantastic! All that hard work to this stage has paid off and you now have a 3D model of your ROI. Right now the layer is loaded with default settings by blender but we can improve this!
5. Subdivide
Lets improve our elevation mesh by subdividing it. You might be wondering what is subdivide? Well simply put, we are cutting up the mesh into smaller squares to improve the output resolution so we get a sharper, defined edges to the elevation layer. Blender gives a detailed explanation here.
Make sure you’re in the viewport scene. Turn of the buildings and street layers under the scene collection and then zoom out so that you have the full extent of your ROI.
To subdivide, get into the edit mode by pressing “tab” on your keyboard. Once in the edit mode, left-click and drag your mouse to cover the extent of your ROI. Doing this will select the vertices which should be highlighted in orange. Then, right-click in the ROI and select subdivide. You can do this several times to get finer subdivisions. Note that it becomes computationally heavy on your machine’s processing power as you get finer subdivisions so find a balance that works for you.
Let’s get out of edit mode to see our changes. You can do this by pressing the tab key on your keyboard and now see noticeable differences after subdividing your mesh. Also turn back on your buildings and street layers to see the full scene collection.
6. Aesthetics
Congratulations if you’ve now reached this stage. There’s so much involved but keep endeavoring to the end (you wont be disappointed). In this step, your artistic self will be exhausted (and I certainly did for this step) as we will manipulate shading, textures and lighting to get the aesthetic feel we want (and right now I feel like getting that evening or early morning sunrise look casting shadows.)
6.1 Set Curser for Camera View
Its important that we set our camera view as this will provide the view to the render engine in blender. Without it, you won’t be able to render anything. In the scene collection window, right-click camera and delete. Next, pan and rotate the viewport scene so you are looking down on your ROI from the z-axis. You can easily do this by pressing 7 on your numpad. Then, in the tool bar on the left of your scene, click curser tool, we will use this tool to position the camera in the x-y plane of the scene. Left-click anywhere on (or outside) your ROI to place the curser, in this tutorial I’ve placed it in the bottom left corner.
Then switch to the x-axis view by pressing 3 on your numpad. Right now the curser is on the same plane as the ROI, therefore we need to elevate it above this plane. To do this left-click anywhere above from where your cursor is positioned.
6.2 Add Camera
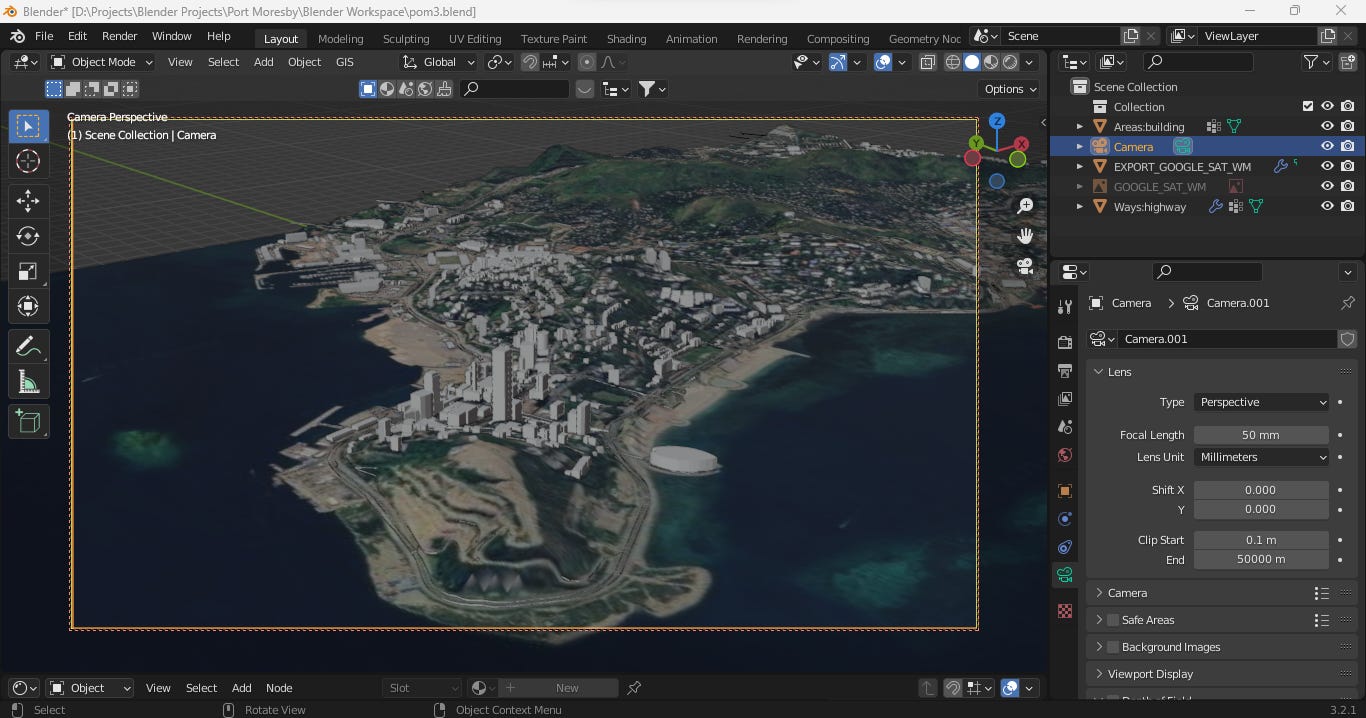
Let’s now add the camera object. On your keyboard, press SHIFT A > Camera, and this will position the camera at our cursor location. Right now the camera is loaded with default views which may or may not be facing your ROI. To set the view settings of the camera, select it in the scene collection and then pan in the viewport scene to the ideal view that you want for your camera to take. Once satisfied with your view use the keyboard shortcut by pressing ctrl + alt + Numpad 0 and this will set the view settings to your camera. You will automatically go into camera view mode but you will notice that you wont see anything at first. This is because of the camera lens clip start and end settings. In Blender, the camera lens Clip Start and End settings define the range within which objects are visible to the camera.
To fix this, go to camera properties and under Lens, set Clip Start to 0.1m and End to 500000m. You should now be able to see your ROI.
6.3. Lighting
This part is perhaps exciting because we will introduce simulated realistic lighting into our scene to illuminate our ROI. Go to Render Properties and in Render Engine, choose from the drop down Cycles.
Then go to World Properties, click on Color and select Sky Texture. You can use the same settings as shown below or experiment to find what you like.
Then go to the viewport shader turn that on to show a preview of the rendered output. You will find that in the top right hand corner of the 3D viewer scene.
7. Render
Congratulations! What a feat for making it this far. You are now ready to render your 3D scene. We will choose to render as image. Go to Render > Render Image. This will start the rendering process. Once its complete, you can save and share to impress your mates.


I can't remember how I found this article, but I'm glad that I did. I have a ways to go to get really good results, but this is a great start. Many thanks.
Very handy. Thanks 😊